Image by Editor
Introduction
The world of artificial intelligence (AI) for developers is changing at lightning speed. You may have likely used tools that offer impressive code suggestions, autocompleting a line or two. But what if your AI could do more? Imagine an assistant that doesn't just suggest a function but writes the entire script, runs it, spots the bugs, fixes them, and even deploys the final project — all while you sip your coffee.
This is the promise of agentic coding, and it's no longer a futuristic concept. It's here today with tools like Goose. This article is your beginner-friendly tutorial to understand and use Goose, a free and open-source AI agent that moves beyond simple suggestions to automate meaningful engineering tasks.
We'll break down what makes Goose special, how it works, and exactly how you, as a data scientist, can start using it to supercharge your workflow.
What Is Goose?
At its core, Goose is an open-source, reusable AI agent designed to run on your local machine. Think of it as an autonomous teammate that can take complex instructions and see them through from start to finish.
Unlike traditional AI coding assistants that live in your text editor and offer snippets, Goose operates in your actual development environment. It can interact with your file system, run terminal commands, and even call external application programming interfaces (APIs). This means it can handle entire workflows, not just individual lines of code.
Developed with transparency and community contribution in mind, Goose is built by Block Inc. and is available to everyone under an open-source license. You can find the complete codebase and contribute to its GitHub repository.
Key Features That Set Goose Apart
Goose is not just another AI wrapper. Its architecture is built around several powerful principles that make it uniquely capable:
- Goose is truly autonomous and can break down a high-level goal into a series of steps and execute them. You can ask it to "build a simple web scraper for this website and output the data as a CSV," and it will handle the planning, coding, testing, and debugging.
- This is a game-changer. Goose can connect to any server that follows the Model Context Protocol (MCP). This standard allows it to plug into a large ecosystem of tools, like databases, version control systems like Git, or external services, greatly expanding what it can do.
- Your code and data stay on your machine. Goose executes tasks in your local environment, which is important for working with sensitive data or proprietary codebases. You maintain full control.
- You're not locked into one AI model. Goose works with any large language model (LLM), from powerful cloud-based options like GPT-4 and Claude to local models you can run on your own hardware. This gives you the flexibility to balance performance, cost, and privacy.
- Goose comes in two flavors to match your workflow:
- The Desktop App: A user-friendly graphical interface, perfect for visual thinkers and those who prefer a chat-like experience.
- The Command Line Interface (CLI): For developers who live in the terminal, the CLI offers speed, scripting capabilities, and deep integration.
Why Should Data Scientists Care About Agentic Coding?
If you're a data scientist, your daily work is a perfect match for what Goose does best. You constantly juggle tasks that are repetitive, multi-step, and require interaction with various tools and libraries. Here’s how Goose can become your secret weapon:
- Rapid Prototyping: Have a hypothesis? Tell Goose to "load the Titanic dataset from Seaborn, train a random forest classifier, and print the accuracy score." It can write the boilerplate code, execute it, and give you results in seconds, letting you move faster.
- Automated Data Pipeline Tasks: Ask Goose to "write a Python script that cleans all CSV files in the
./data/raw folder, handles missing values by imputing with the median, and saves the cleaned files to ./data/processed." It will create, run, and even debug the script for you.
- Simplifying MLOps: Want to version a model with DVC or log an experiment to MLflow? You can ask Goose to handle the Git commands, the DVC setup, or the MLflow logging calls, abstracting away the operational difficulties.
- Environment and Dependency Management: New project? Ask Goose to "create a new Python virtual environment, install pandas, scikit-learn, and matplotlib, and then generate a requirements.txt file." It's like having a DevOps engineer on your team.
Getting Started With Goose: A Step-By-Step Guide
Let's start by installing Goose and running your first agentic task. The process is straightforward, thanks to excellent documentation.
// Step 1: Installation
There are different ways you can install depending on your operating system (macOS, Linux, or Windows). You can download the desktop app installer directly from the Goose website or the releases page on GitHub.
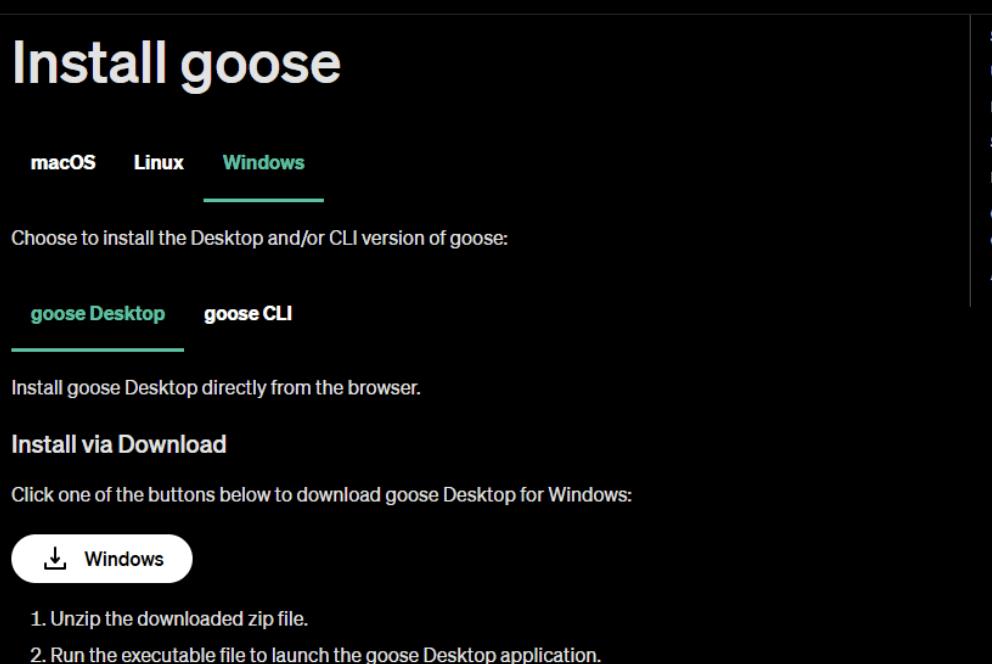
Figure 1: Goose Installation
// Step 2: Initial Setup And Configuration
Extract the files from the downloaded zip file. Open the extracted folder and click on the Goose application.
The first time you run it, Goose will guide you through a setup process. The most important step is configuring your LLM provider. You'll need an API key from a provider like OpenAI, Anthropic, or others. Goose will ask which provider you want to use and securely prompt you for the key. You can also configure this later or switch providers by editing the configuration file, giving you the flexibility to use different models for different tasks.
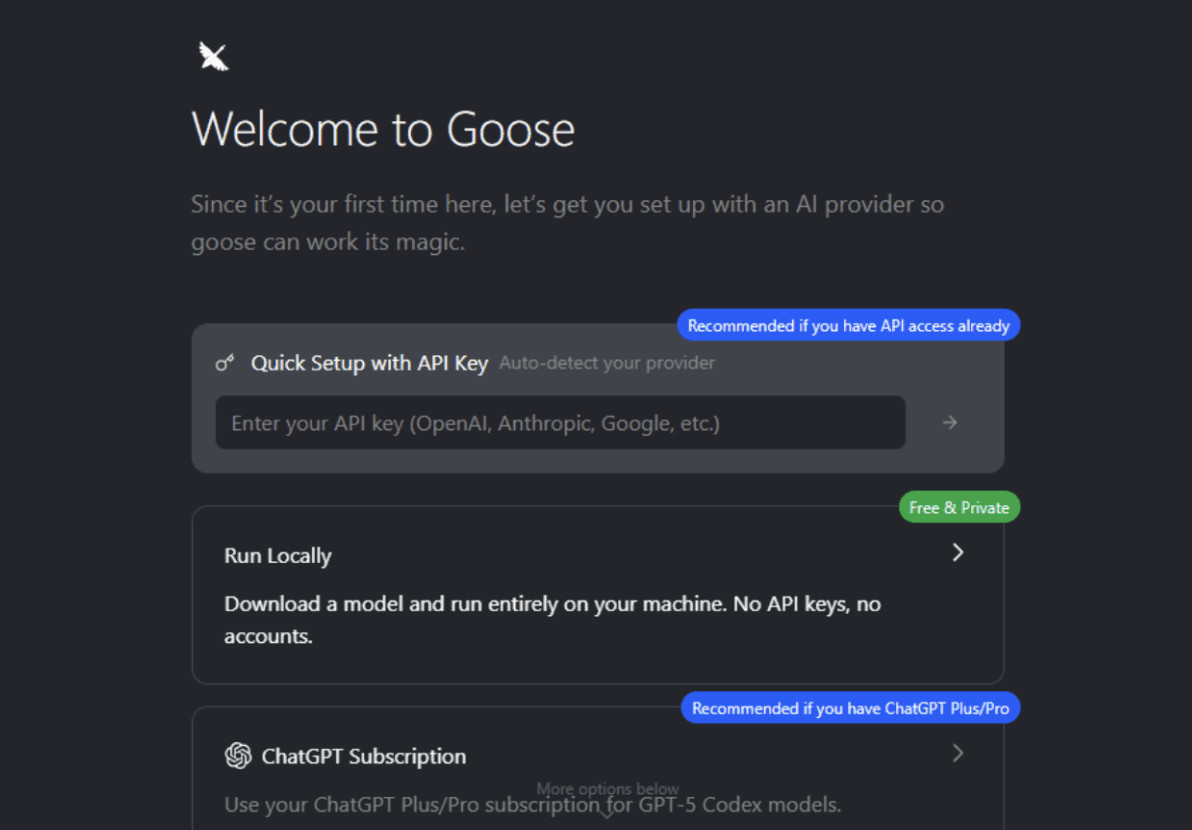
Figure 2: Goose Initial Setup and Configuration
// Step 3: Your First Agentic Session
Now for the fun part. Let's give Goose a task that showcases its agentic abilities. We'll ask it to perform a simple data analysis. Start a new chat:
You'll be greeted with a prompt. Now, type your instruction. Be as clear and specific as you would be with a junior colleague.

Figure 3: First Agentic Session
Type in the following prompt:
I'm in a new, empty directory. First, create a new Python script called analyze_stocks.py. In that script, write code to:
1. Use the yfinance library to download the last 3 months of daily stock data for Apple (AAPL) and Microsoft (MSFT).
2. Calculate the 20-day simple moving average for the closing price of each stock.
3. Create a single plot showing the closing prices and the moving averages for both stocks, with a legend.
4. Save the plot as stock_analysis.png.
Then, run the script. If there are any errors (like missing libraries), figure out how to fix them and run it again until it succeeds. Finally, let me know if the image was created successfully.
Now, sit back and watch.
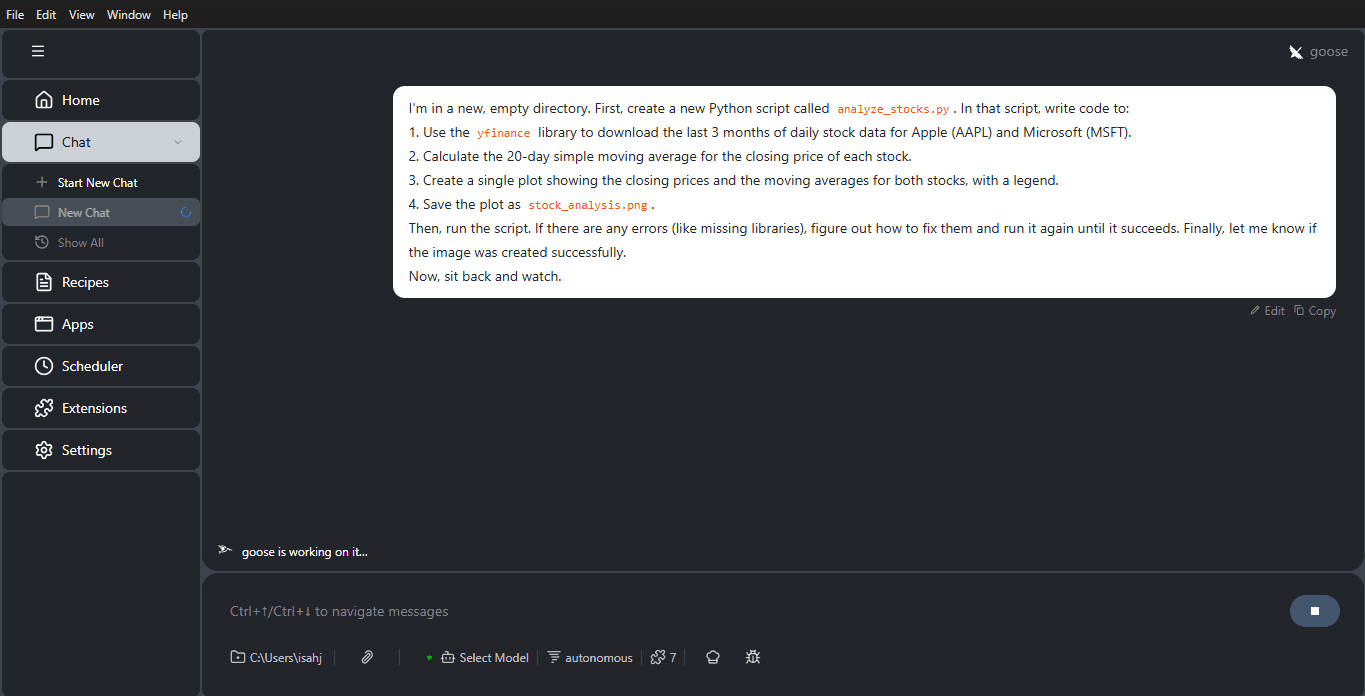
Figure 4: Goose Chat interface
Here's what happened:
- We download the last 3 months of daily stock data for Apple (AAPL) and Microsoft (MSFT) using the yfinance library.
- We calculate the 20-day simple moving average for the closing price of each stock.
- We create a single plot showing the closing prices and the moving averages.
This simple example demonstrates the core of agentic coding, where a single instruction leads to a multi-step, self-correcting workflow. You can find more complex tutorials on the official site.

Figure 5: Goose Chat interface
Expanding Goose's Capabilities With MCP
Goose's true potential is accessed through its extensibility. The MCP is an open standard that allows Goose to connect to any server that implements it. Think of MCP servers as "skills" or "tools" you can give to Goose.
For example, you could connect Goose to the following:
- An MCP server for PostgreSQL: Then you could ask, "Connect to my local database, run a query to find the top 10 customers by lifetime value, and save the results to a CSV."
- An MCP server for GitHub: Your instruction could be "Look at the open issues in my repo 'data-project,' find the one labelled 'bug,' and create a new branch to start working on a fix."
- An MCP server for Slack: You could have Goose monitor a channel and automatically summarize discussions or post updates.
This ecosystem turns Goose from a powerful local agent into a central orchestrator for your entire development and data workflow.

Figure 6: Goose Settings
Conclusion
Agentic coding represents a significant step forward in how we interact with AI. It's a shift from asking for help with a small piece of code to delegating entire tasks and trusting the AI to figure out the steps.
Goose makes this powerful paradigm accessible, free, and under your control. For data scientists, it's an invaluable tool to automate tedious tasks, prototype rapidly, and manage the increasing complexity of modern projects. By running locally, being LLM-agnostic, and extensible via MCP, it puts the power of autonomous AI agents directly in your hands, right on your own machine.
The best way to understand its potential is to try it. Install Goose, give it a task you've been dreading, and experience the future of coding for yourself.
// References
Shittu Olumide is a software engineer and technical writer passionate about leveraging cutting-edge technologies to craft compelling narratives, with a keen eye for detail and a knack for simplifying complex concepts. You can also find Shittu on Twitter.